Category: Product Overviews
Nexus Rebel LS – Product Overview

If you’re planning on putting a General Motors LS into a hot rod, a boat, a muscle car a resto-mod, or a lawn mower, then Haltech’s all-new Nexus Rebel LS Engine Management System and terminated wiring harness is perfect for you!
Let’s look at what the Rebel LS is, and what it isn’t.
If you’re looking for a Plug’n’Play ECU for a late-model LS-powered vehicle, this isn’t the ECU for you. It does not connect to any factory wiring harnesses, and it won’t communicate with a factory communication network (known as the CAN network) so the dash, ABS, and body control module would not work as expected. It is though, an Engine Management System and Terminated Engine Harness package that provides a very cost-effective and simple solution to get your Gen III or Gen IV General Motors LS engine up and running in your special project.
The Rebel LS is sold in two different part numbers:
• HT-220201 to suit Gen III
• HT-220204 to suit Gen IV
It’s only if you plan on interchanging Gen III and Gen IV parts on your engine would you need to grab any extra breakout harnesses – everything required is included in each kit.
However, if you do need any part of the wiring harness, each part of the harness is part-numbered and can be purchased as a replacement part separately.
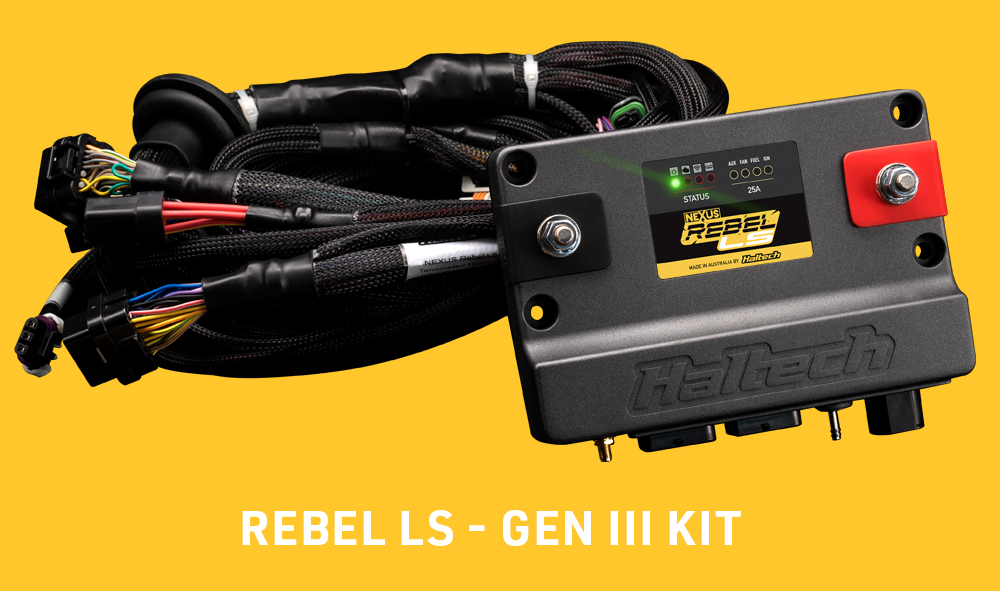

What’s in the box?
HT-220201 – NEXUS Rebel LS – Suits Gen III

Kit Includes
• HT-220001 – Rebel ECU
• HT-186500 – Main Harness
• HT-186504 – Cable Throttle + IAC sub-harness
• HT-186501 – LS EV1 Injector Sub-Harness
• HT-187003 – T56 Transmission Harness
• HT-186123 – 2 Pin Bosch Alternator Harness
• HT-186124 – 4 Pin Delco Alternator Harness
• HT-186125 – 2 Pin Yazaki Alternator Harness
• HT-186508 – Gen III Knock Sensor Adaptor
Sensor Pack
• Bosch LSU 4.9 O2 Sensor
• Weld on fitting for O2 Sensor
• Air Temperature Sensor M14 x 1.5
• Weld on fitting for Air Temp Sensor
HT-220204 – NEXUS Rebel LS – Suits Gen IV

Kit Includes
• HT-220001 – Rebel ECU
• HT-186500 – Main Harness
• HT-186505 – 6 Pin DBW Adaptor
• HT-186507 – Corvette pedal adaptor
• HT-186502 – LS EV6 Injector Sub-Harness
• HT-187003 – T56 Transmission Harness
• HT-186123 – 2 Pin Bosch Alternator Harness
• HT-186124 – 4 Pin Delco Alternator Harness
• HT-186125 – 2 Pin Yazaki Alternator Harness
• HT-186510 – Gen IV Oil pressure sensor adaptor harness
• HT-186511 – Gen IV MAP sensor adaptor harness
Sensor Pack
• Bosch LSU 4.9 O2 Sensor
• Weld on fitting for O2 Sensor
• Air Temperature Sensor M14 x 1.5
• Weld on fitting for Air Temp Sensor
Flexibility is built-in with the Breakout Harness System
The beauty of our breakout harness system is that if you want to add drive by wire to your Gen III (normally a cable-throttled engine) you can simply grab the Gen IV DBW throttle breakout and Corvette Pedal breakout, plug them in, and away you go.
The same goes for converting from EV1 to EV6 injectors or swapping alternators – there‘s no need to be cutting into wiring harnesses or booking in at the auto electrician.

What is the difference between the Nexus Rebel LS and the Nexus R3?
One of the biggest differences between the R3 and the Rebel LS is the ability to configure different pins and wires to do virtually anything, and while that’s great for flexibility, it’s a little more time-consuming and does leave room for error.
With this in mind, we’ve set up the Rebel LS with dedicated inputs and outputs that don’t require configuration and work as intended right out of the box. Every wire in the harness is labeled and configured in the software so there’s no chance of a setup or configuration problem.

There’s simply no need to spend hours working on a pin-out, or assigning pins and functionality in the software. Just read the labels on the harness and plug them into the associated device. Having dedicated inputs and outputs has allowed us to keep hardware and wiring harness costs down, allowing us to pass that cost saving onto you.
But, we know that if you’re putting an LS into your project car there will always be a level of customization, so we’ve included some configurable channels.
• 1x 25amp output
• 5 x digital outputs
• 4 x digital inputs
• 2 x analogue inputs
These are user-configurable and extra to the inputs and outputs required to run the engine.

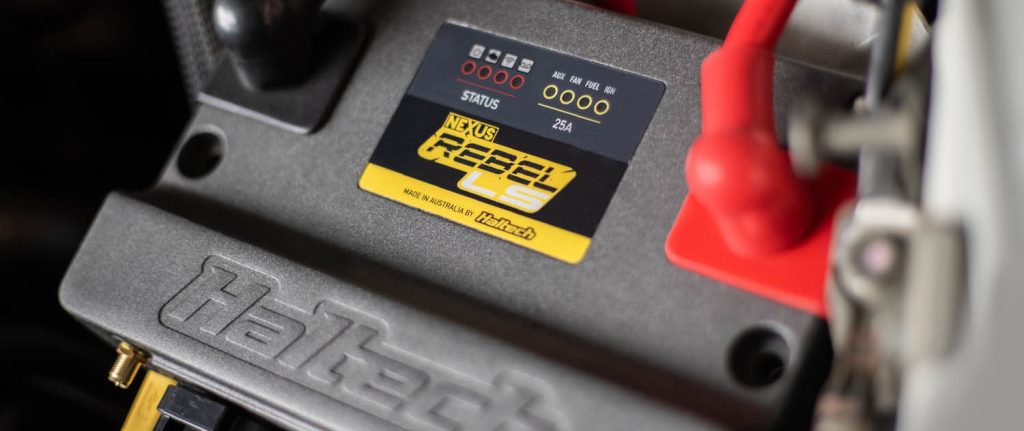
Now, let’s take a look at the ECU itself. It looks a lot like the R3, and again, we’ve done that to keep the costs down, but inside it’s been designed specifically for the LS engines. The only visual difference is the use of the screw terminals over the Surlok connectors found on the R3. Surloks can be hard to come by, so we’ve done this for ease of use.
On the transmission side of things the harness includes the electrical connector for the T56 speed sensor, but you could run any manual gearbox or mechanically shifted automatic transmission like a Powerglide or TH400.
We will be adding support for popular electronically controlled transmissions in the future and they will integrate with the current harness system.
The Rebel LS has a “CAN” communication network that allows communication with all the popular Haltech CAN devices like the iC-7 Dash, 8 and 15 Button Keypads, and the Power Distribution Modules or PD-16s. In fact, you could connect up to 4 PD-16 units and have the entire car including headlights and tail lights controlled through the ECU avoiding the need for external fuses and relays.

Setup Wizard
As for the software, there’s a setup wizard that runs when you first go online with the ECU.
It asks for a little information about your particular setup then it builds the Fuel and Ignition maps, as well as makes setup changes depending on the configuration.
It’ll ask things like which variant of engine you’re using, what’s the compression ratio, what camshaft you are using, what injectors, and which coils. Asking you to let us know which components are in play, so we can build the closest tune file for your combination.

The Rebel LS ECU is equipped with advanced long-term learning which allows it to monitor the Air to Fuel ratio, the ignition table, and knock detection feedback as well as idle quality and continually make adjustments in the background. The longer the engine runs the better the tune-up gets!
You can go online with the Nexus NSP software and make tuning changes just like you’re used to with the rest of the Haltech range, but there is certainly no need to – The setup wizard takes care of it all!

The Rebel LS is also compatible with the “Haltech Connect App”, which will be available later in the year.
This app allows you to monitor data in real-time on your smartphone or tablet, as well as make tuning and setting changes (like adjusting your rev limit or launch control RPM) as well as check and clear trouble codes or do a little data logging.
JUST THE FACTS
| OUTPUTS | |
| Ignition | 8 x Pre-Configured Outputs |
| Injector | 8 x Pre-Configured Outputs (High Impedance Only) |
| Low Side Switched / Digital Pulsed Outputs (DPO) | 5 |
| 25A Outputs | 3 x Dedicated (Ignition / Injection, Fuel Pump and Cooling Fan) 1 x User Definable |
| INPUTS | |
| User Definable Analog Voltage Inputs (AVI) | 2 |
| Engine Position Inputs | 2 x Dedicated Crank And Cam inputs |
| User Definable Synchronised Pulsed Inputs (SPI) | 4 (Can Be Programmed For AVIs) |
| Pre Configured Knock Inputs | 2 |
| On-board Wideband Controller (LSU 4.9 Only) | 1 (Expandable To 10 With Haltech CAN WB Modules) |
| Ignition Switch Input | 1 |
| COMMUNICATIONS | |
| CAN Bus Networks | 1 x Dedicated Haltech CAN |
| High-Speed USB 2.0 (USB-C interface) | 1 |
| On-board Wi-Fi | YES |
| OTHER | |
| On-board Data Logging | 32MB |
| On-board MAP Sensor | 4Bar (Absolute) / 43.5 PSI Gauge |
| Oscilloscope | 4 Channel |
| 5V Sensor Supply | 1 |
| 8V Sensor Supply | 1 |
| Sensor Ground | 1 |
| FEATURES | |
| Easy Set Up Wizard | YES |
| Drive-By-Wire Throttle Support | 1 |
| Flex Fuel | YES |
| Closed Loop O2 Control | Dual Bank (Requires Additional Sensor / Controller) |
| Knock Control | Dual |
| Variable Cam Control | NO |
| Auto Trans Control | Coming Soon |
| Long Term Learning | YES – 3D |
| Data Logging | Laptop + Onboard |
| Anti-Lag Rotational Idle | YES |
| Launch Control | YES |
| Traction Control | YES |
| Tuning Table Resolution | 32 x 32 – 3D |
| Engine Protection | Multi-Level |
| CAN Networks | 1 (Haltech CAN Only) |
| Nitrous Control | YES |
| Boost Control | 3D Closed Loop |
| Flat Shift Control | YES |
| Shock Travel & Ride Height | YES |
| Race Timer | YES |
| Driveshaft And Engine RPM Targeting | NO |
Is the Nexus R3 right for you?
This article will help you decide whether or not the Nexus R3 is the right VCU for your application, and if not, what other options are available to you from Haltech. We’ve already covered all the specs and features of the Nexus R3 in another article, we highly recommend reading it first.
Engine Support
From single cylinder motorcycle engines, through to 4, 6 or 8 cylinder engines in Straight, V or Boxer configurations and everything in between – the Nexus R3 will run most popular performance engines.
If your engine is not listed on our website, just contact us via email or call any of our regional Haltech offices to confirm whether or not one of our ECUs can support your engine configuration and the sensors fitted to it.
Injection and Ignition
The Nexus R3 can control port-injected engines up to 8 cylinders in Sequential operation (meaning each injector and each coil would be fired individually), and up to 12-cylinder engines in Semi-Sequential operation.
Things get a little more complicated if you want to run Staged Injection with two injectors per cylinder. The Nexus R3 has a total of eight injector outputs so it can fire two injectors per cylinder in sequential mode on engines up to four cylinders. On a six or eight cylinder engine you can still perform Staged Injection, but not in sequential mode – this is where we’d probably recommend stepping up to the Nexus R5.
Popular Applications
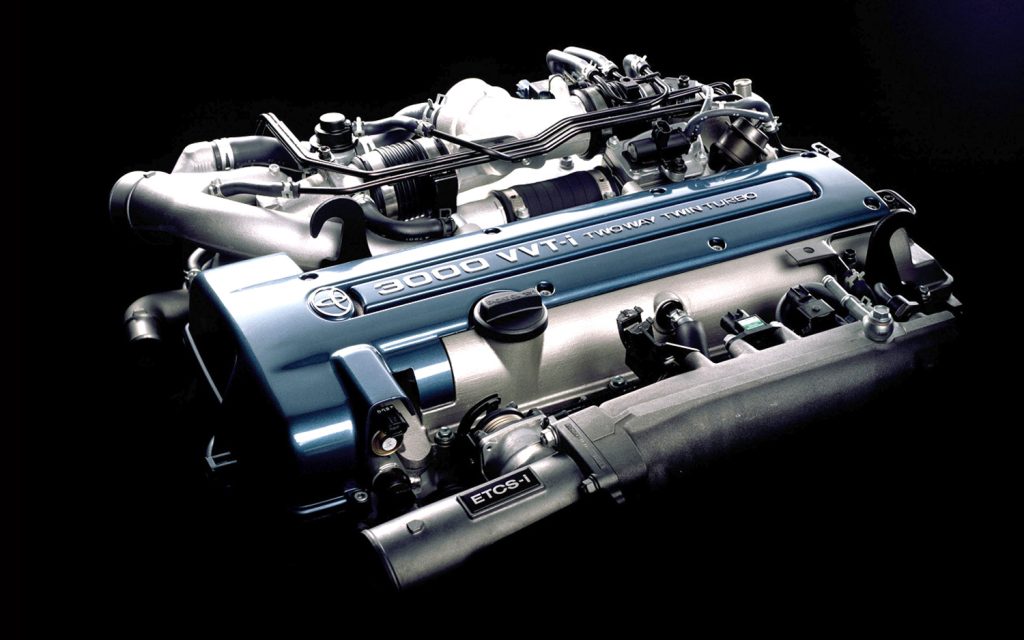
Performance six cylinder engines like Toyota’s 2JZ, Nissan’s RB and Ford’s Barra that come with sequential injection and one injector per cylinder from factory – go with the Nexus R3. For two injectors per cylinder setup on these engines – step up to the Nexus R5.
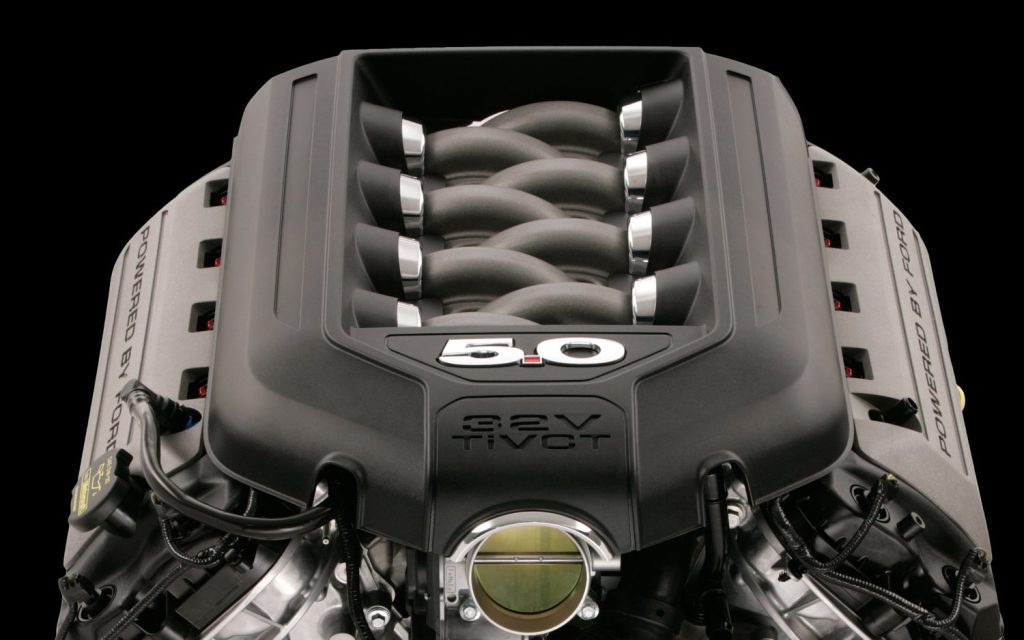
The same rule applies to all V8 engines like the GM LS, Ford’s Godzilla or Coyote. The R3 will handle single injector setups while staged two-injector setups should go with the Nexus R5.


What about rotary engines?
Mazda’s rotary engines run two injectors and two spark plugs per rotor so with 8 injector outputs and 8 ignition outputs, the Nexus R3 will control a single, twin, triple or quad rotor engine. However, if you’re planning to run more than 8 injectors on your rotor, you’re entering the Nexus R5 territory.
Other reasons for choosing Nexus R5 over Nexus R3
Well, with 10 PDM channels, the R3 might fall short of being able to run the entire electrical system of your car, front to back. You have two options here: First – is to expand the PDM channels available to you by adding a PD16 Power distribution module to your R3.
Use the R3 to control all the engine functions and leave all the body functions like headlights, tail lights, indicators, wipers, and basically anything in the car that is normally powered through a conventional relay or fuse to the PD16. This is still an elegant and easy to setup that you control fully through the R3 within the NSP (or Nexus Software Programmer) software.
The other option is to use the R5 which, with its 15 PDM channels can control the entire vehicle. Keep in mind that you can also add up to four PD16s to your Nexus R5 should you need it.
Expand and Adapt
This is probably one of the least talked about attributes of the Haltech Nexus system – its versatility, and its almost infinite expandability. You can add up to four PD16s to your Nexus R3. Granted, you probably wouldn’t do that simply because at that point you’ll be better off stepping up to an R5 but the option is there if you need it. The same applies to the R5 – it can also be expanded with up to four PD16s.
You can also expand the functionality of your Nexus R3 with CAN keypads. Both the R3 and the R5 accept up to four keypads – that’s two 8-button and two 15-button keypads.
What about Elite ECUs?
The Nexus series VCUs use Haltech latest technology and are the most advanced computers in the range. So where does that leave the Elite series ECUs? As it happens there are still plenty of cases where you could opt for an Elite instead of a Nexus.
As good as they are, the Nexus series VCUs are still relatively new on the market. What that means is that they are primarily geared toward new builds, re-wired from the ground up. The Elite series has been around for well over a decade and over the years it has built up a huge assortment of engine and car specific wiring options.
Along with the standard universal wiring looms, the Elite series ECUs are available with fully terminated engine harnesses for popular engines like the LS, RB, 2JZ, Barra or Mazda’s 13B. The Elite series ECUs also have over 40 model-specific Plug and Play adaptor kits that plug directly into the OEM harness. So if you’re using an existing engine harness or doing a simple EFI conversion or engine swap, then the Elite series ECUs are still your best option. And remember you can expand the functionality of your Elite ECU by adding a PD16, or a keypad.
Let’s not forget the price. If you’re on a budget, the entry level single connector Elite ECUs offer great value for money while still running the same NSP software that controls the Nexus Series.
Nexus R3 FAQ
Q: I want to swap my Elite 2500 for a Nexus R3, can I repin the existing wiring?
Q: I repin anElite Plug’n’Play adaptor to suit the R3?
Both the Elite and the Nexus series use the AMP 1.0mm Superseal pins. This means you can pull the pins out of the Elite connectors and push them into the Nexus plugs. Keep in mind the keyways on the plugs for the R3 and R5 are different from each other (this is so you can’t push the wrong plug into the wrong socket). The R3 and R5 have heavy SurLok connectors that would need to be added in order to supply the current required associated with the PDM part of the R3 and R5.
Q: Can the R3 control E-gates?
The R3 can control up to 2 E-gates, the same as the R5. Each E-gate requires 2 analog inputs (used for temperature and position sensing) as well as 2 outputs to control the DC motor.
Q: Can we do Torque Management Driveshaft RPM targeting with the R3?
Yes, in a drag racing application we can configure a Target Engine RPM and a Target Driveshaft RPM then set up fuel, ignition and boost cuts as well as limits in order to achieve the desired targets.
Q: Does the R3 do Automatic Transmission Control?
The R3 can control A340, 4L60, 4L80, ZF6HP, or you can configure a custom automatic transmission with up to 10 speeds, torque converter lockup, line pressure control, accumulator pressure control and everything in between. There are even specific control strategies for Liberty and Lenco drag racing gearboxes.
Q: Does the R3 control Nissan’s ATTESA 4WD system?
Yes, you can map the 4WD system vs. wheel slip, acceleration, steering angle or a combination of these.
Q: What is the NSP Quick Tune Feature and how does it work?
The Quick Tune feature works in two different ways. If you press Q while the engine is running, the ECU will look at the current air-fuel ratio, then look at the target air-fuel ratio and make a change to the fuel map in order to make them the same. Alternatively it allows you to take a log of the current air fuel ratios, across as many engine load and RPM sites as you like. You can then press R in order to make bulk changes to all the sites you have visited – this significantly cuts down the fuel map tuning process.
Q: Can the R3 detect individual cylinder knock? Can it control individual cylinder knock retard?
The R3 and R5 both detect knock per cylinder, meaning you will know which cylinder is the one making the scary noises. Both the R3 and R5 offer short and long term knock control. The short term control takes a programmed amount of ignition timing out on initial knock, while the long term knock control will fill out a 3D table per cylinder of knock trims. You can then choose to apply common values between the long term knock tables to the base ignition map.
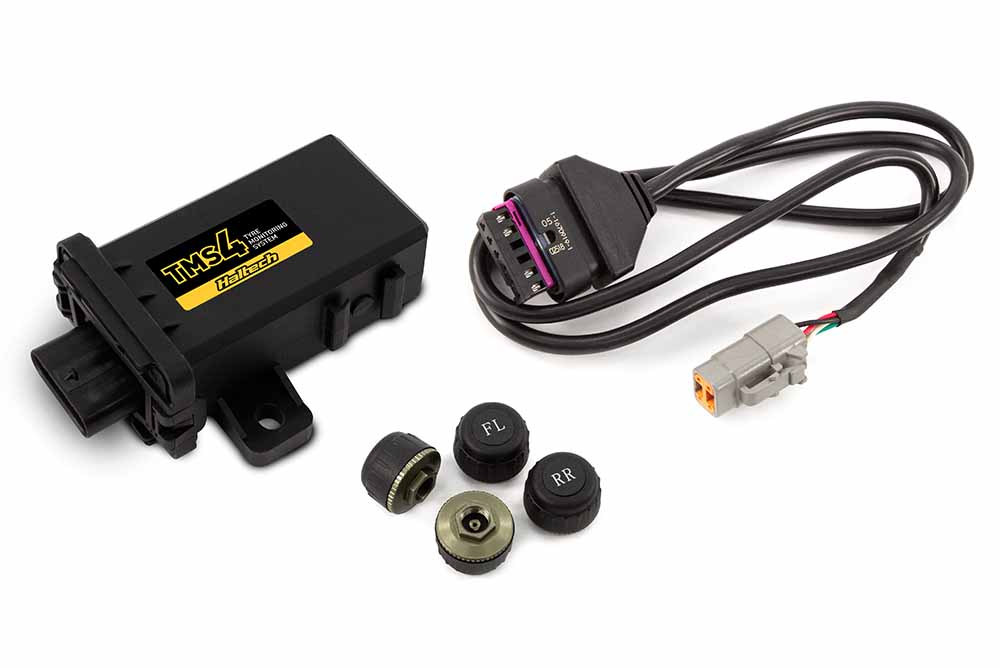
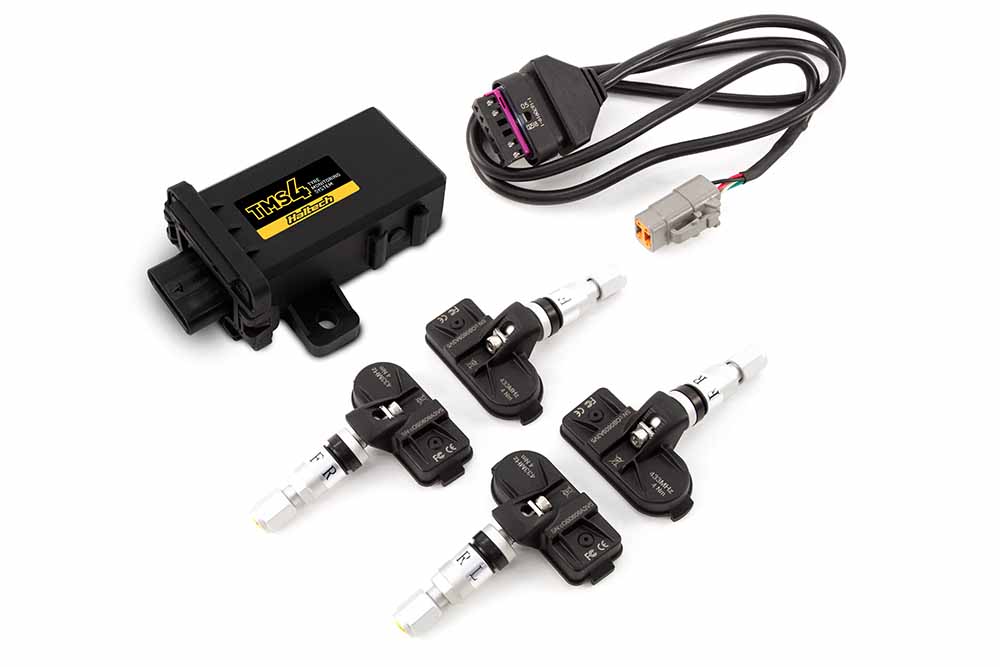
Tyre Monitoring System TMS-4
The Haltech TMS-4 is a simple, plug and play way to measure both tyre temperature and pressures through Haltech Elite and Nexus series ECUs. TMS-4 is available in two kits with either external or internal sensors.
In or Out?
External Sensors are fitted directly to the valves on your tyres without removal. These sensors screw directly on to your existing valves. They are held in place with an anti-theft lock nut and will not require tyre removal or re-balancing. Each sensor uses a small battery located under the sensor cover and typically has a 1 to 2 year life span before needing to be replaced.

Internal Sensors mount inside of the tyre and rim. These sensors replace the existing tyre valves meaning you will have to remove the tyre from the wheel to install. They use a built-in battery which has an average life span of about 3 years.
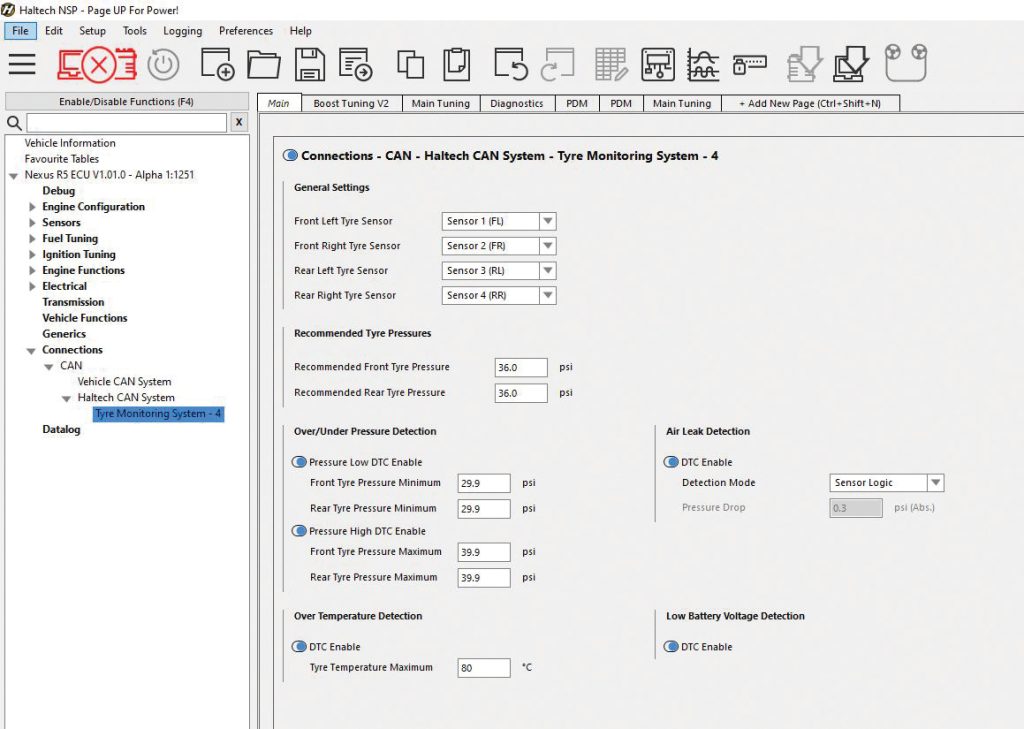
Both sensors have a working range of 0-110 psi and can trigger a DTC if it detects too high or too low of a pressure. They also can warn you if tyre temperature gets too high.
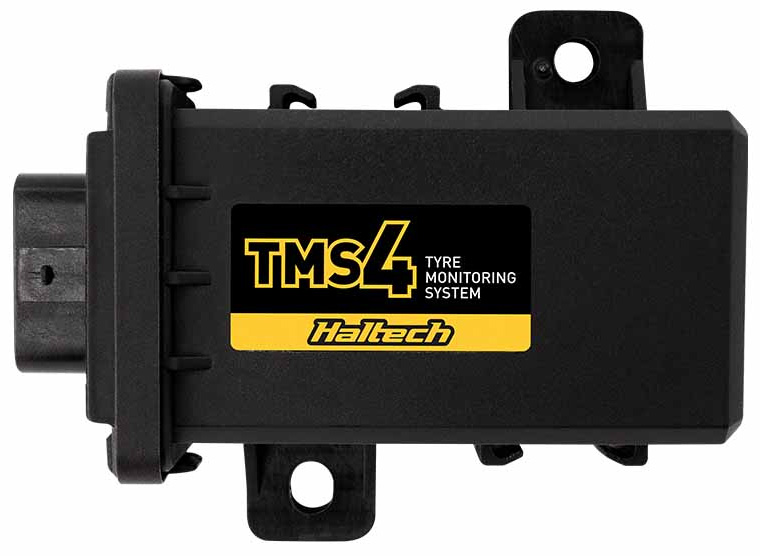
How does it all work?
The TMS-4 receiver takes in the signal from each of the four tyre pressure sensors and sends it to your Haltech ECU through the CAN cable (included in each kit).
Connecting the receiver is a simple matter of plugging the 6 pin connector into the rear of the receiver and connecting the DTM connector into your Haltech CAN network.
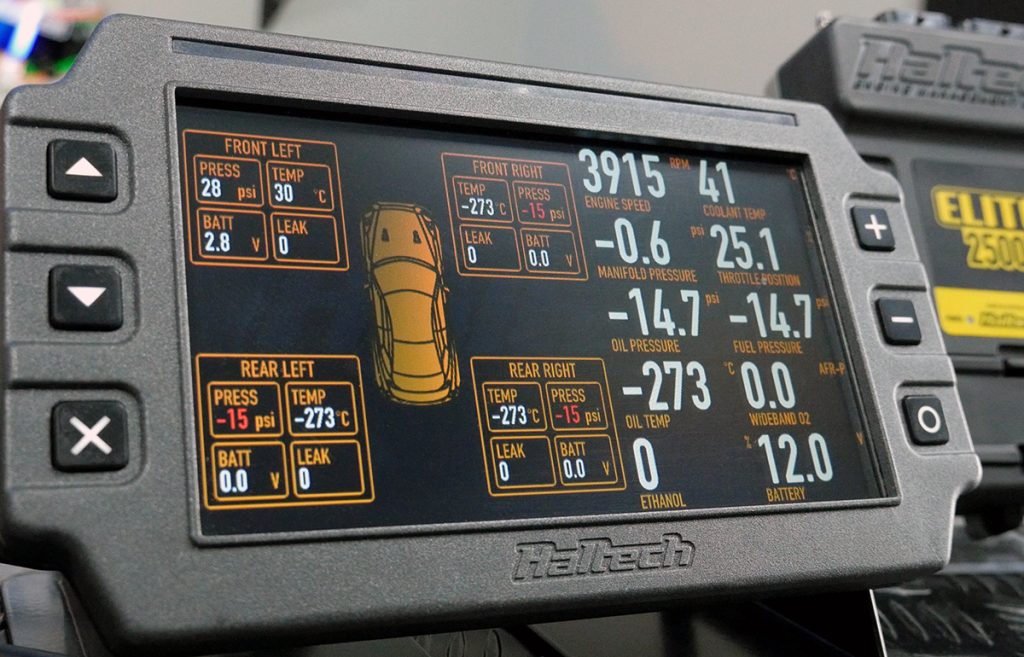
They will display as separate tyre channels in the ESP software and can be re-assigned to any wheel if you need to rotate tyres or swap wheels. The sensors can also be turned off in the software if you do not want to monitor a specific wheel.
The latest firmware and software update for the iC-7 allows you to monitor these tyre temperature and pressure channels on your iC-7 display dash.
NOTE: To use the TMS-4 on any of our Elite series ECUs you will need to upgrade to at least 2.37 firmware and be using ESP software version 2.45 or later. Both of these are now released and available from our DOWNLOADS page.
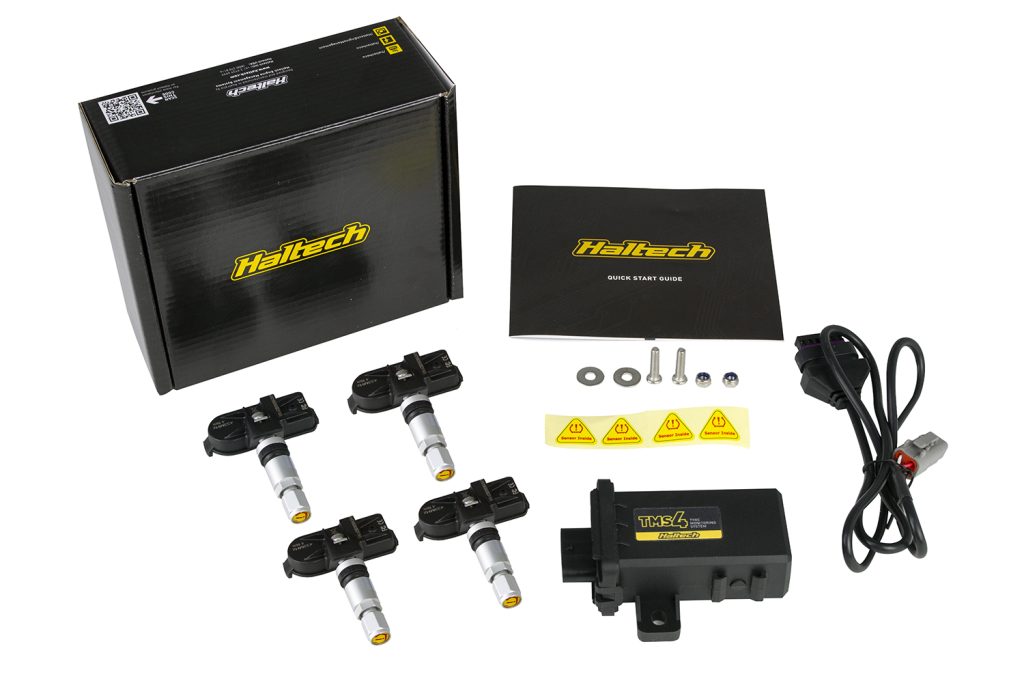
TMS-4 Internal
Part No: HT-011600
Includes: 1 x Haltech TMS-4 Reciever 1 x TE Mcon to DTM-4 CAN Cable 4 x Internal Sensors. Mounting hardware. Warning sticker set. Quick Start Guide.
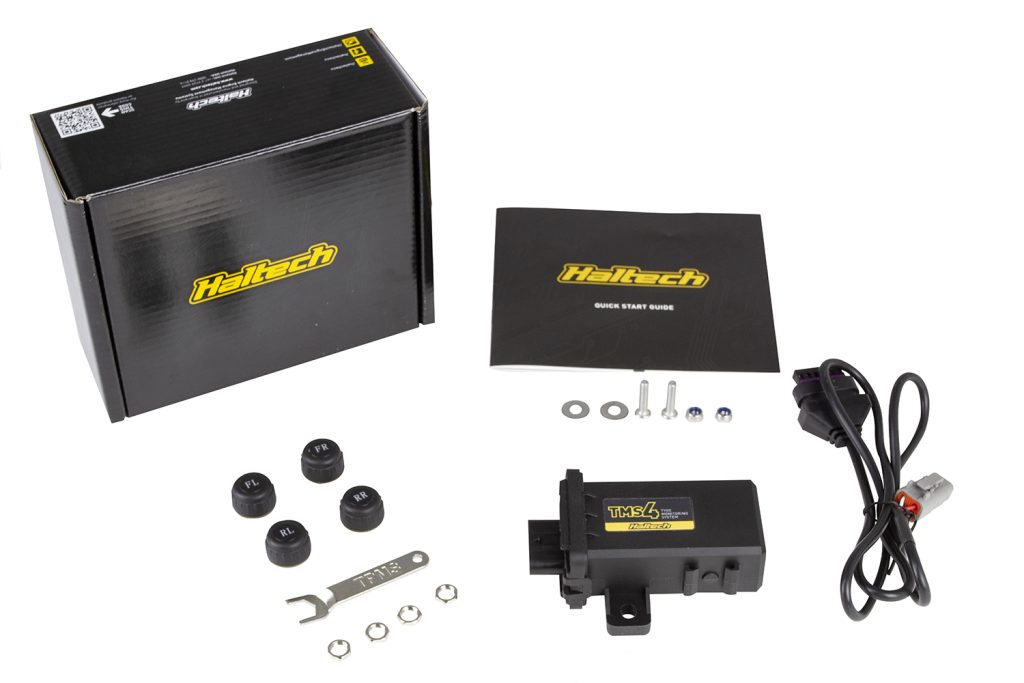
TMS-4 External
Part No: HT-011601
Includes: 1 x Haltech TMS-4 Reciever 1 x TE Mcon to DTM-4 CAN Cable 4 x External Sensors 4 x anti-theft lock nuts. Lock nut spanner, mounting hardware, Quick Start Guide.
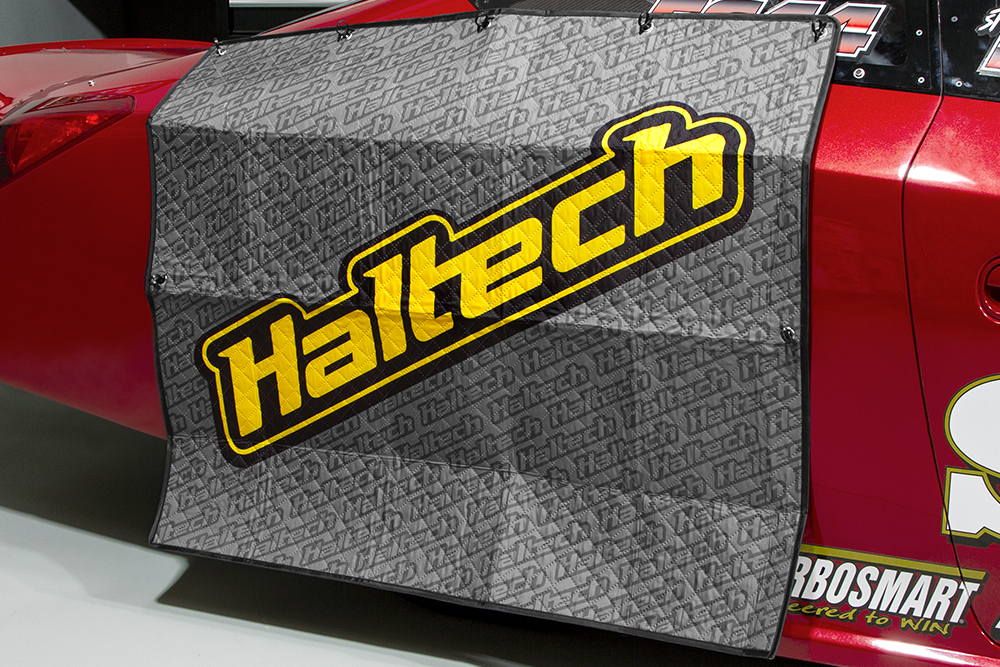
Haltech Tyre Cover
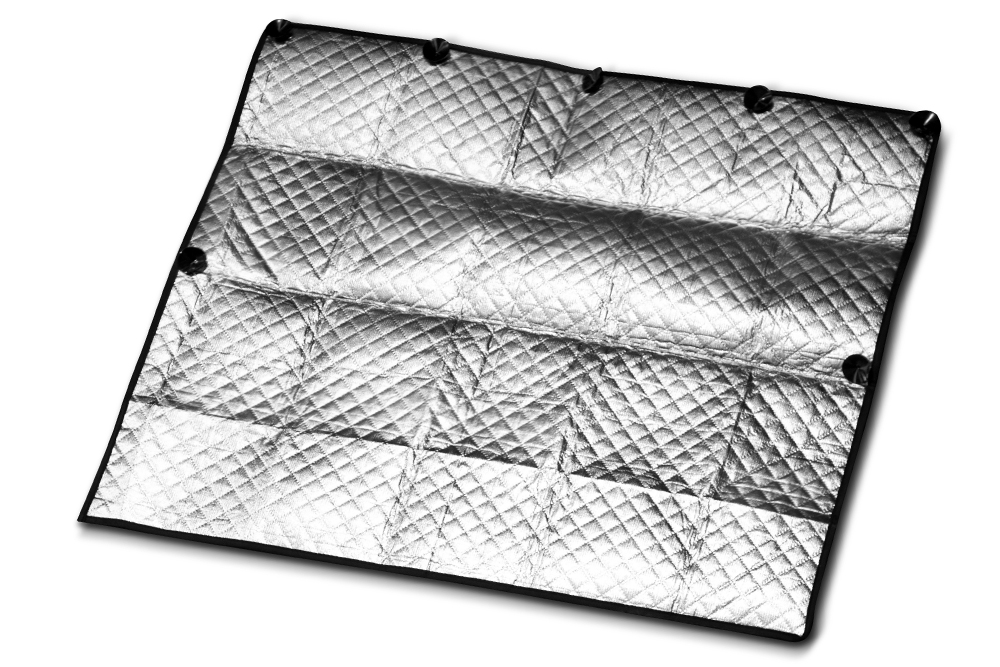
Keep the sun off your tyres and maintain consistent tyre pressures with a Haltech Tyre Cover. Seven suction caps ensure the cover will stay in place even in windy conditions. Generously sized at 106x91mm (42″x36″). Chemical fibre cotton traps the heat between the top and the bottom layer. Insulating aluminium film on the bottom layer stops the heat from getting through to the tyres.
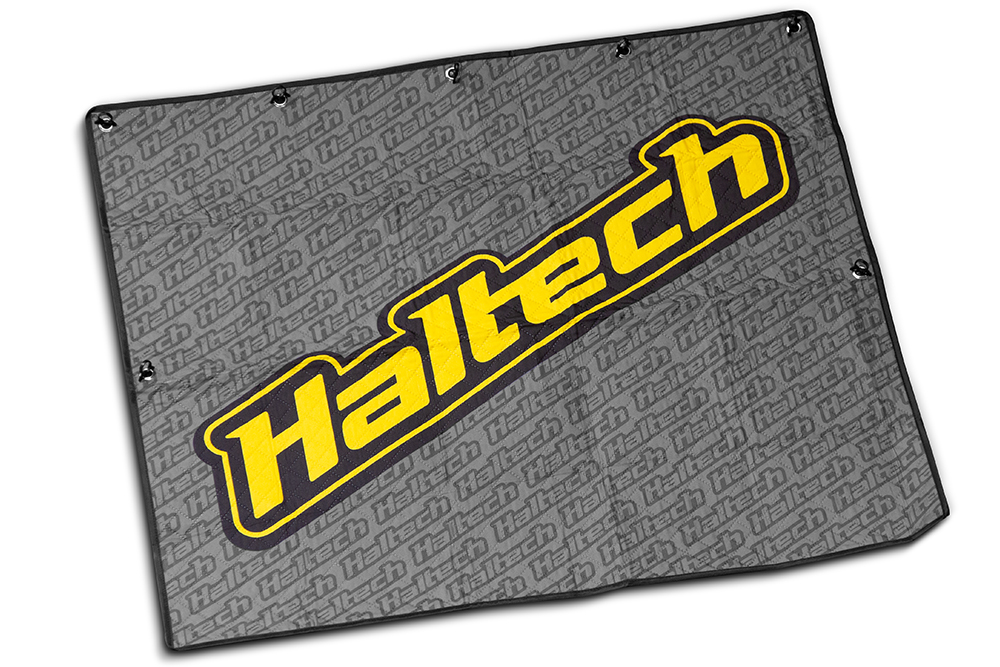
Part No: HT-309026
Includes: Haltech Tyre Cover, 7 suction caps
Size: 106x91mm (42″x36″)
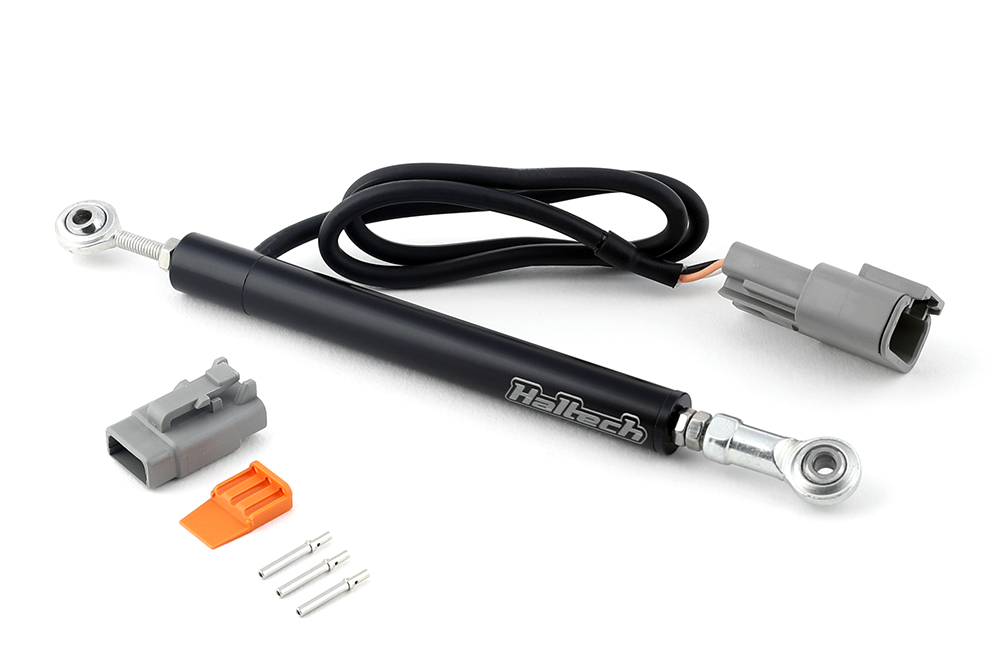
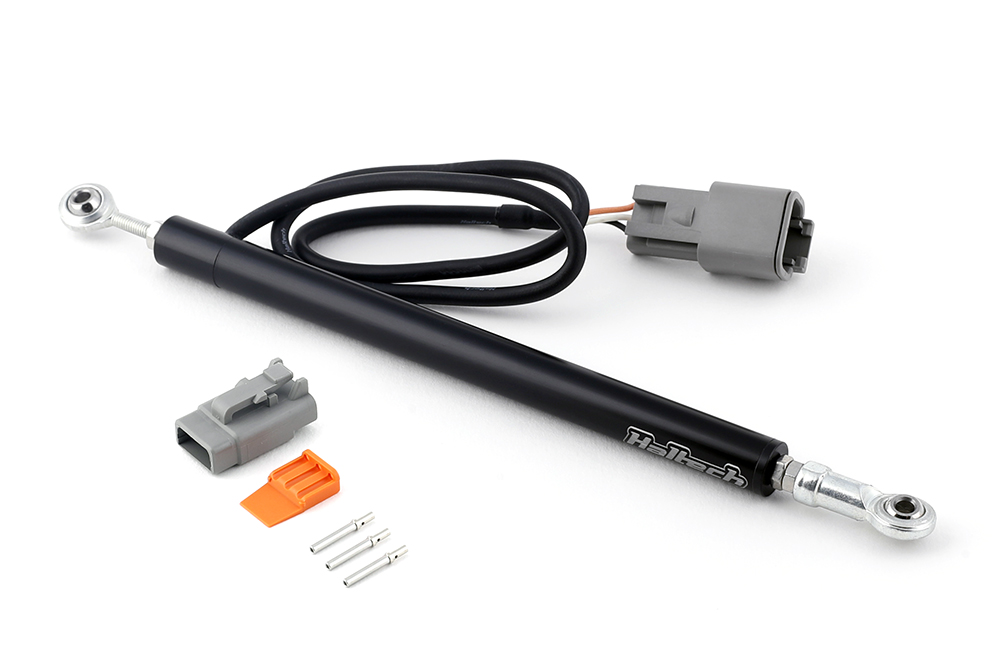
Linear Position Sensors
Most commonly used as shock travel sensors, the Linear Position Sensors can also be used to measure gearbox shaft position, differential angle, or in any application that requires linear position data. In short, these simple sensors can make your ride not just faster but also more predictable.
Used as shock travel sensors, Haltech’s Linear Position Sensors can measure and log the speed and distance of your shock’s compression, extension, rebound, etc. to give you an accurate picture of how the vehicle reacts to the track surface and changes. They remove the guesswork out of chassis tuning. Armed with this information, you can significantly cut down on testing and adjusting, saving not just time but wear and tear on your vehicle.
How do they work?
A linear potentiometer includes a slider that moves in both directions, proportionally dividing the applied voltage over its operational range thus creating a voltage output based on the position of the slider.
This voltage signal is then received by the ECU and interpreted as “travel” measured in inches or millimeters. As well as travel we can also monitor the speed of compression and extension of the slider.
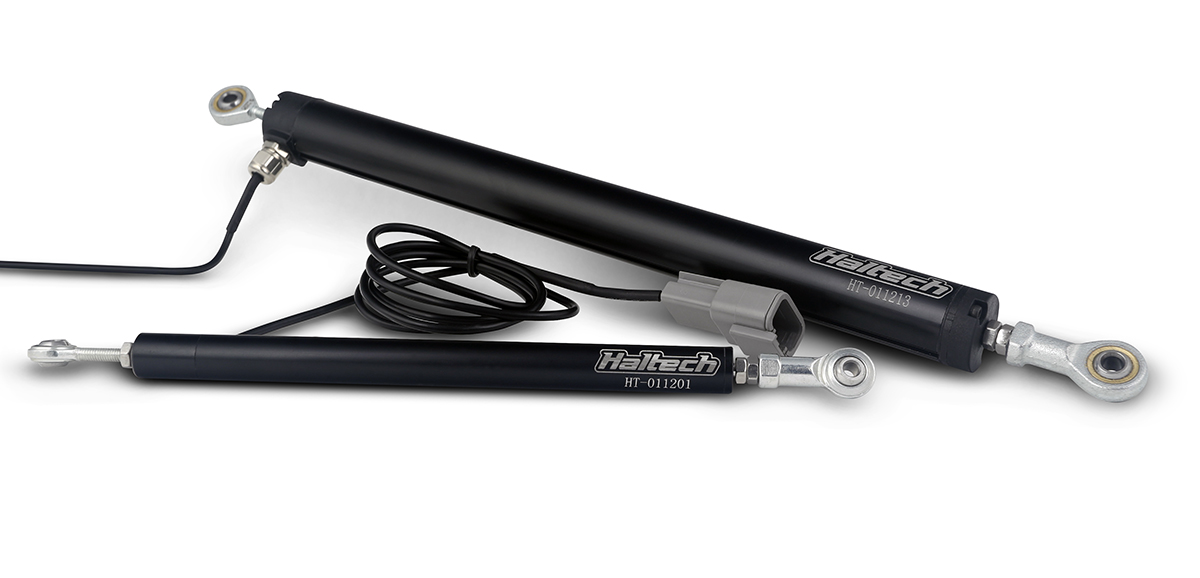
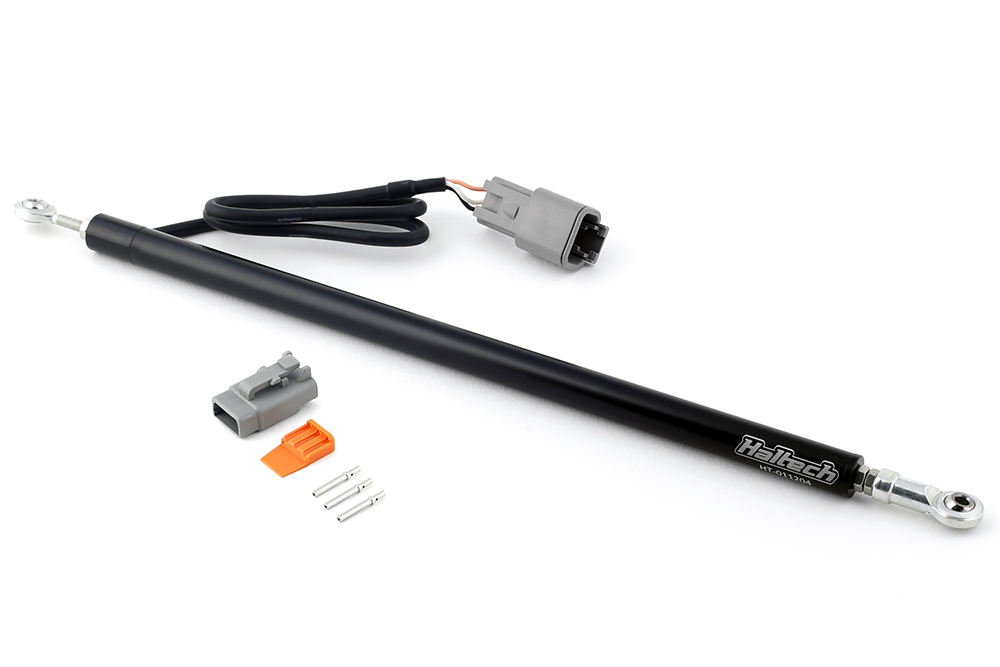
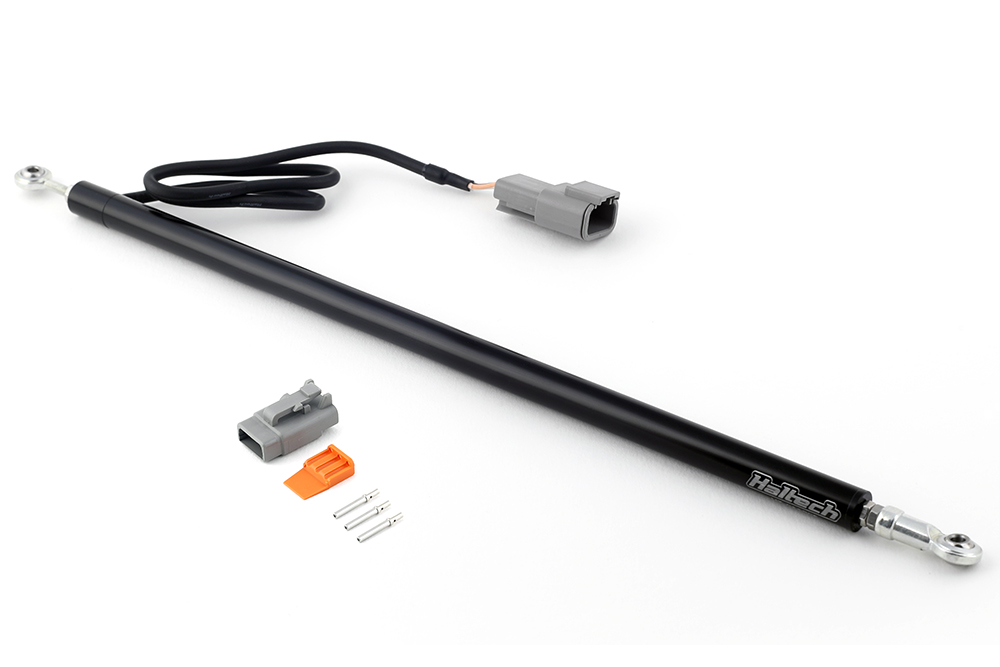
Linear Position Sensor Range
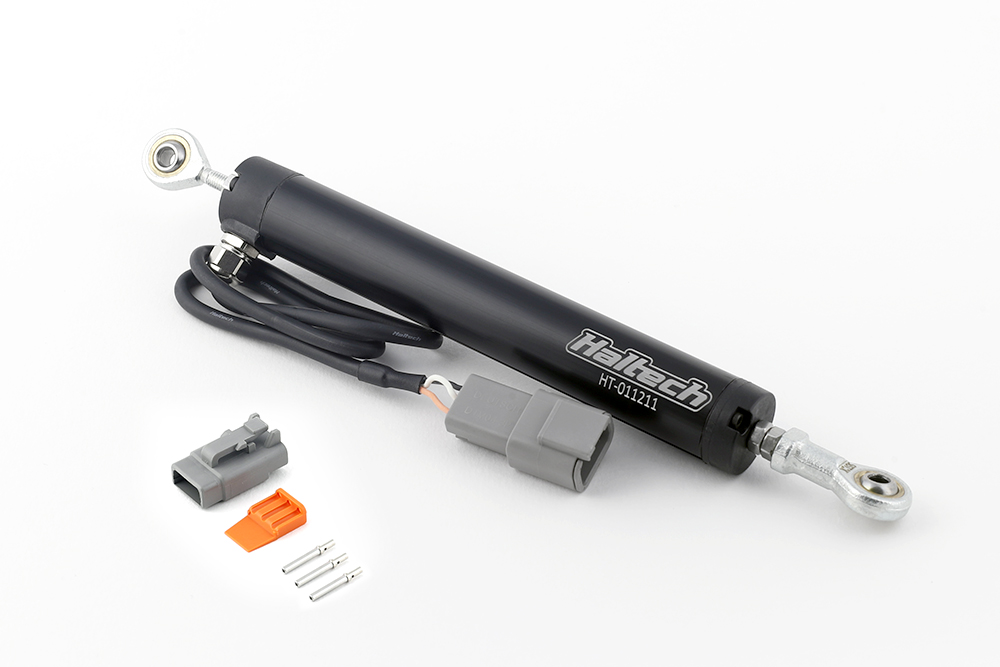
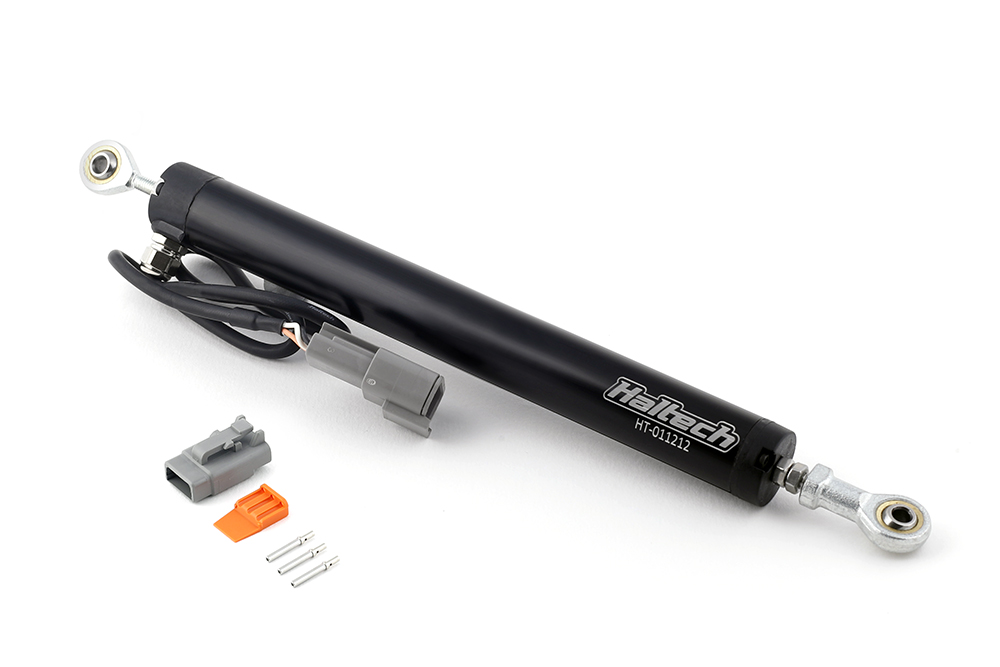
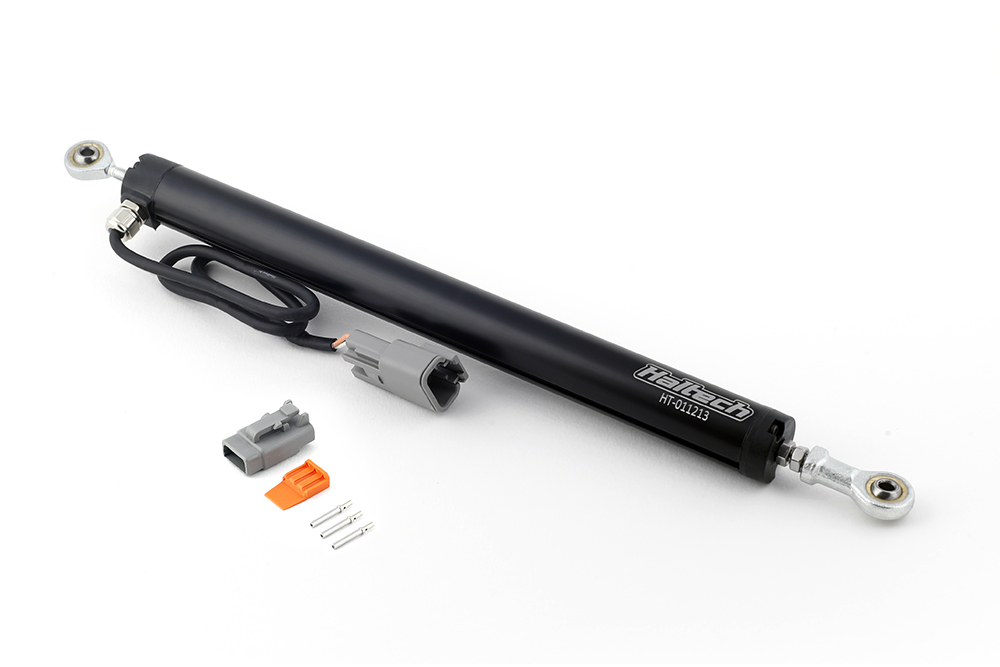
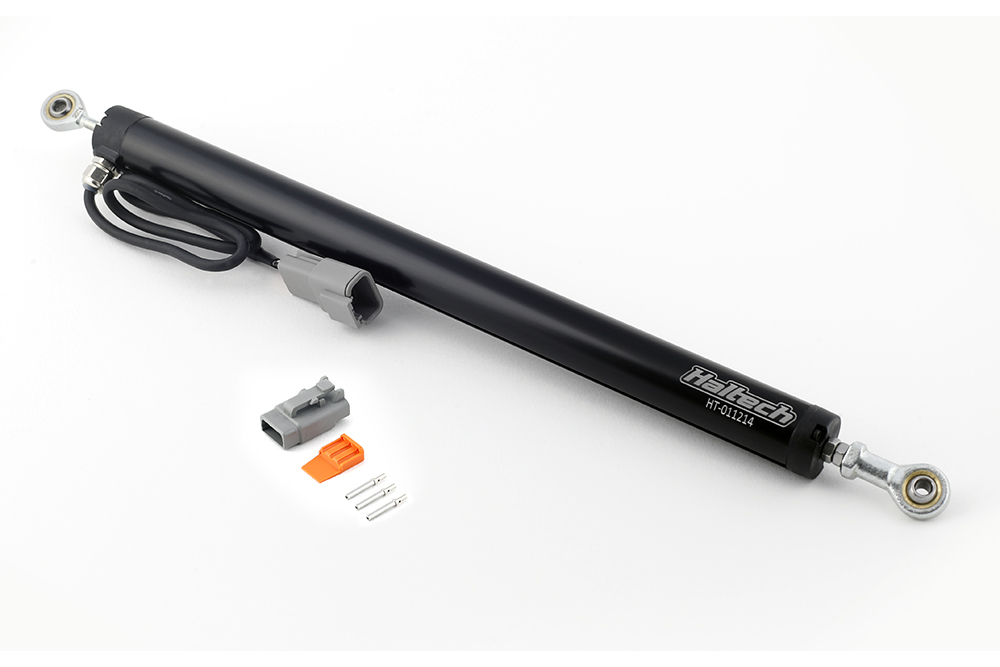
Haltech Linear Position Sensors are available in two diameters – 1/2″ and 1″ with each diameter offering different lengths (see table below). Each sensor comes complete with a 450mm Terminated lead (Terminated with DTM 3 Receptacle) and an opposing DTM 3 Connector with pins seals and wedge.
| Part Number | Product Name | Diameter | Travel |
|---|---|---|---|
| HT-011201 | Linear Position Sensor | 1/2″ (12.70mm) | 50mm (1.9″) |
| HT-011202 | Linear Position Sensor | 1/2″ (12.70mm) | 100mm (3.9″) |
| HT-011203 | Linear Position Sensor | 1/2″ (12.70mm) | 150mm (5.9″) |
| HT-011204 | Linear Position Sensor | 1/2″ (12.70mm) | 200mm (7.8″) |
| HT-011205 | Linear Position Sensor | 1/2″ (12.70mm) | 250mm (9.8″) |
| HT-011211 | Linear Position Sensor | 1″ (25.40mm) | 100mm (3.9″) |
| HT-011212 | Linear Position Sensor | 1″ (25.40mm) | 150mm (5.9″) |
| HT-011213 | Linear Position Sensor | 1″ (25.40mm) | 200mm (7.8″) |
| HT-011214 | Linear Position Sensor | 1″ (25.40mm) | 250mm (9.8″) |
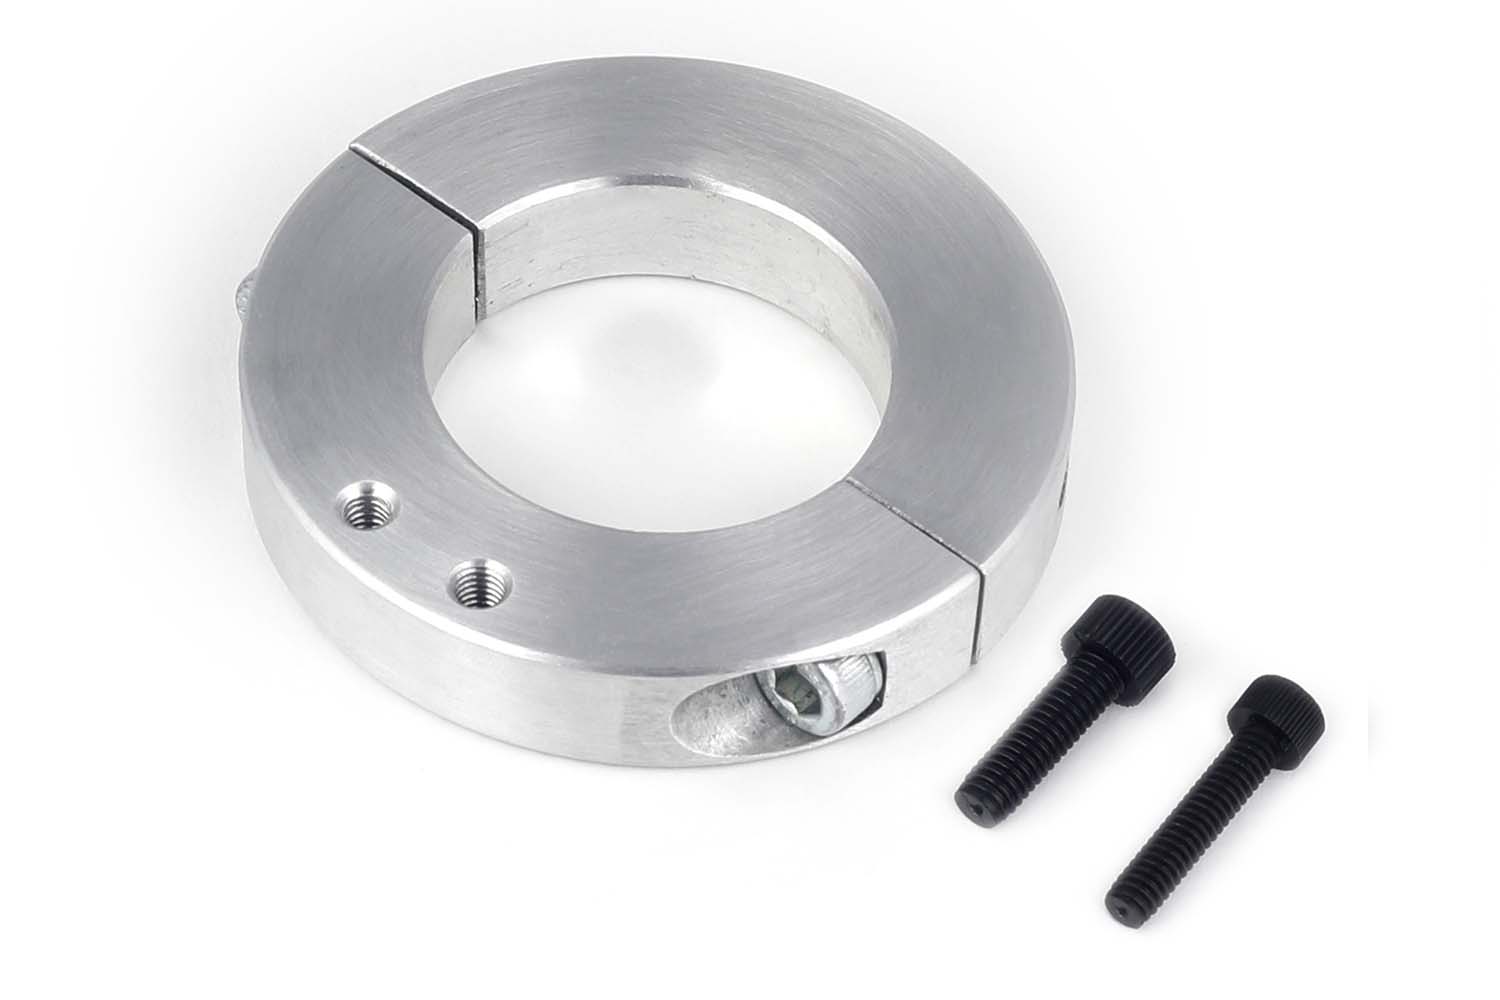
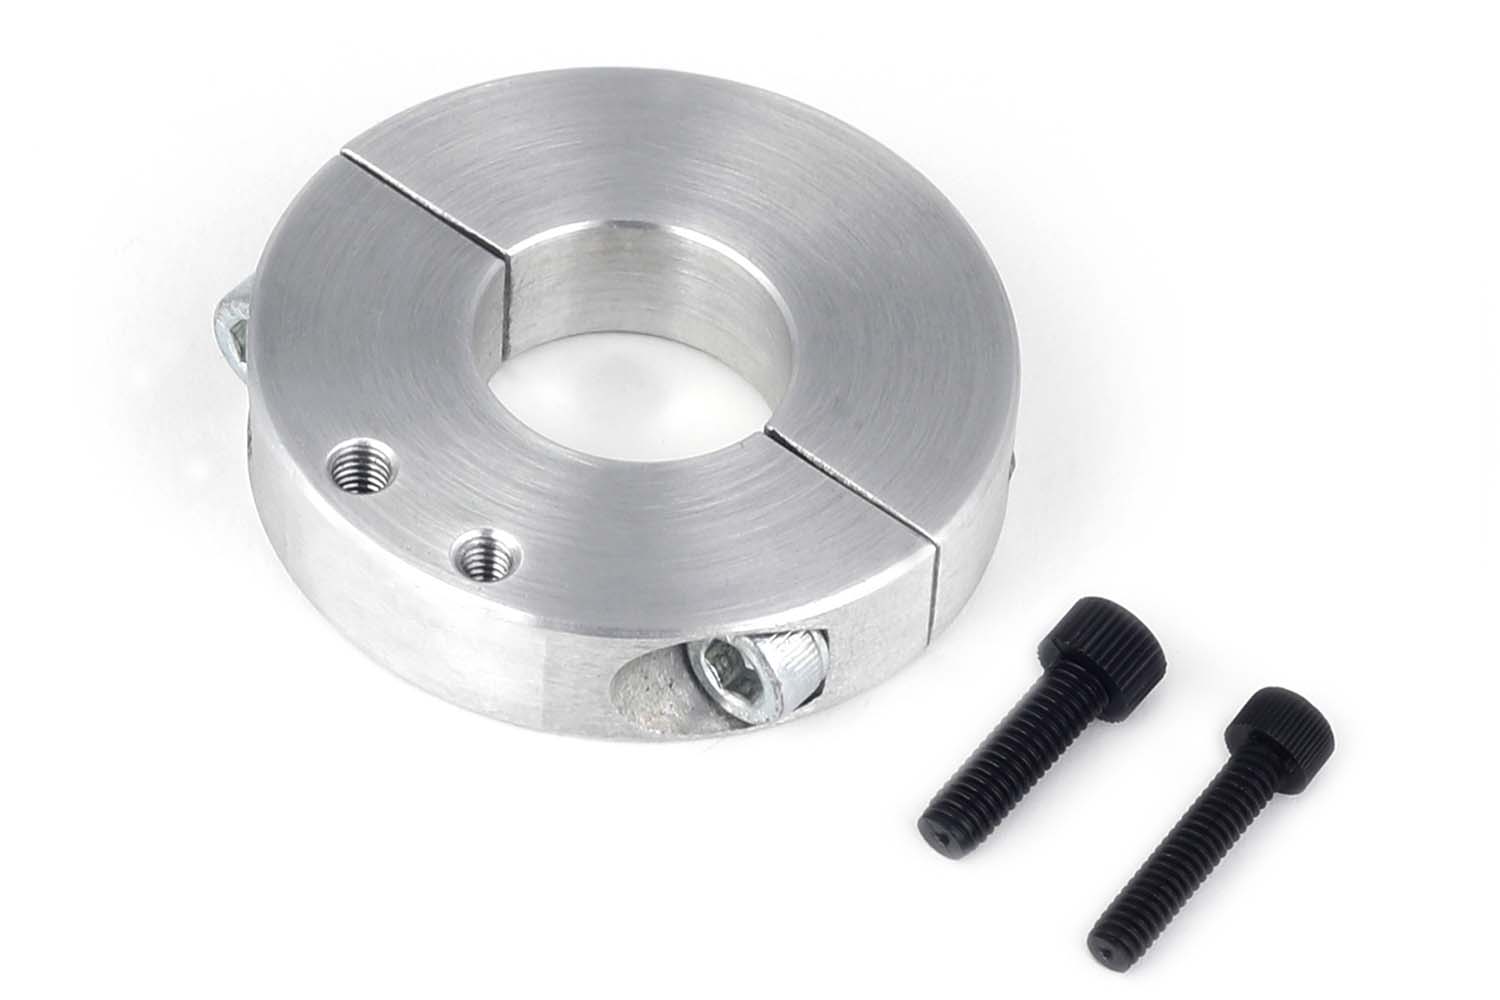
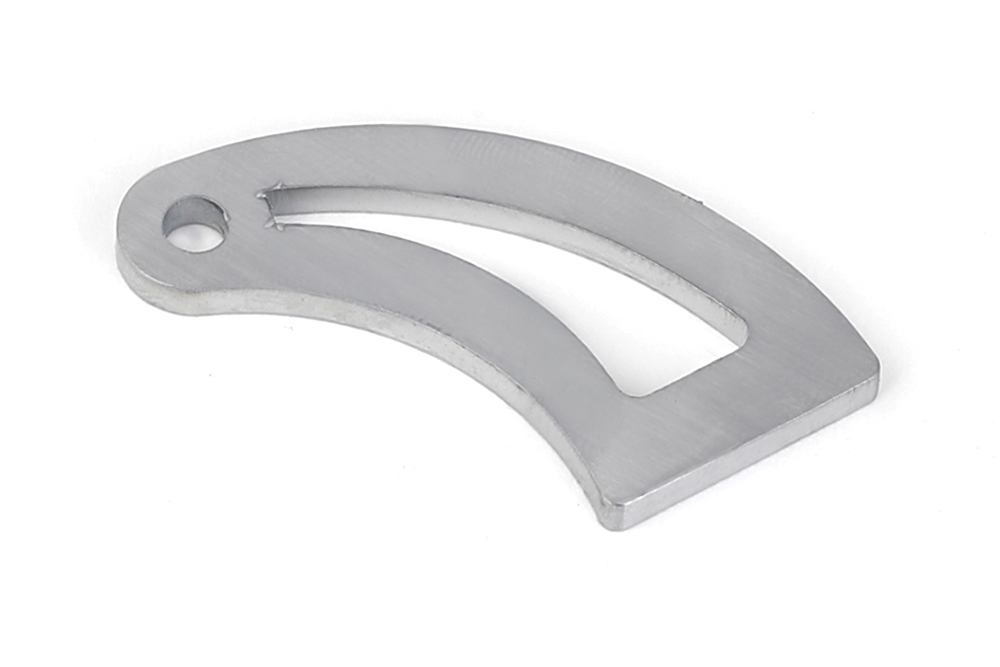
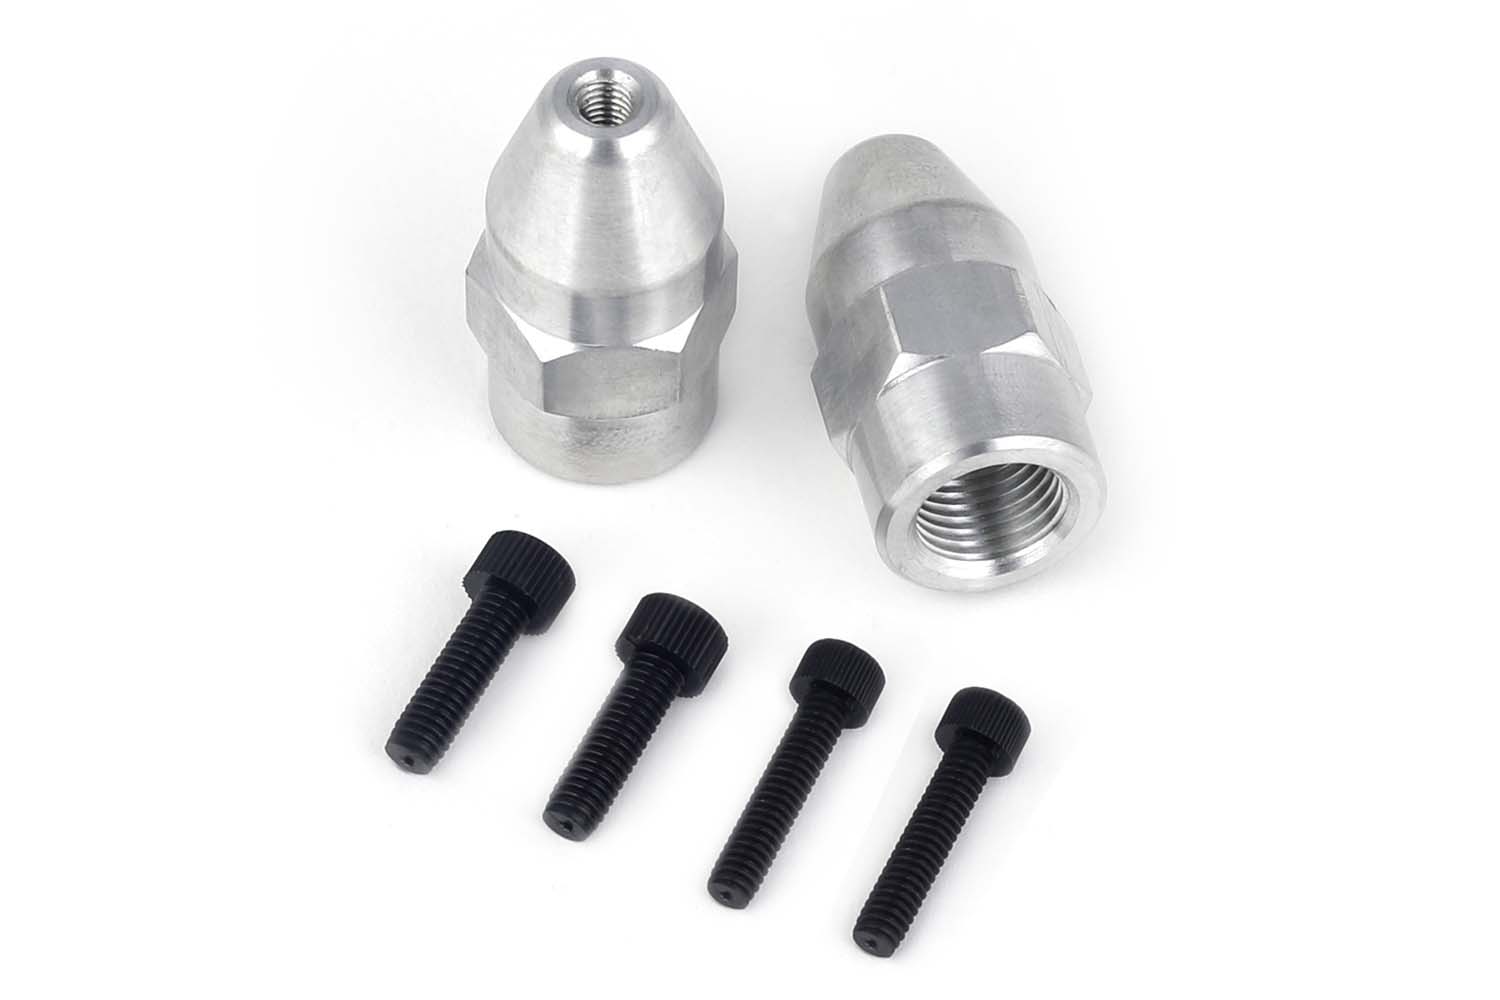
Mounting Accessories
Haltech Linear Position Sensors are supported by a range of mounting accessories, including split collar mounts, nuts, and weld-on tabs.
| Part Number | Product Name | Size |
|---|---|---|
| HT-011230 | Weld-on Shock Sensor Tab (mild steel) | |
| HT-011231 | Aluminum Shock Travel Sensor Mounting Nuts | 1/2″-20 thread |
| HT-011232 | Split Collar Shock Sensor Mount | 3/4″ (19.05mm) |
| HT-011233 | Split Collar Shock Sensor Mount | 7/8″ (22.22mm) |
| HT-011234 | Split Collar Shock Sensor Mount | 1″ (25.40mm) |
| HT-011235 | Split Collar Shock Sensor Mount | 1 1/8″ (28.57mm) |
| HT-011236 | Split Collar Shock Sensor Mount | 1 1/4″ (31.75mm) |
| HT-011237 | Split Collar Shock Sensor Mount | 1 1/2″ (38.10mm) |
| HT-011238 | Split Collar Shock Sensor Mount | 1 5/8″ (41.27mm) |